
Transform Your Boat Interiors with Custom Leather Dye for Lasting Style
Sun, salt air, sunscreen, damp towels, and everyday wear can age a boat interior fast. Vinyl and leatherette seating that once looked crisp can turn chalky, faded, stained, or uneven. Full replacement is expensive and often wasteful, especially when the material is still structurally sound.
That is where custom leather dye earns its place. With the right prep, colour choice, and protective finish, dye can refresh seating, cushions, helm chairs, bolsters, and cabin accents without stripping the boat down to the bones.

Why leather dye works so well in marine interiors
A quality dye system does more than cover a tired surface. It bonds colour into the material, then protects it with a topcoat designed to handle movement, moisture, and abrasion.
For boat interiors, that matters. Seats flex when people climb aboard. Cushions heat up in direct sun. Cabin upholstery faces humidity changes throughout the season. Paint-like coatings that sit too heavily on the surface can crack or peel if the prep is poor. A proper marine-safe dye and coating system keeps the finish more flexible.
The biggest benefits are practical:
Better durability
A well-applied dye resists everyday scuffs, fading, and surface wear better than quick cover-up products.
Custom colour control
Match the original shade, warm up a dated beige, add contrast piping, or create a two-tone helm seat that looks intentional.
Lower cost than replacement
If the upholstery is not torn, brittle, or crumbling, dyeing can extend its useful life.
Less waste
Refreshing usable material keeps cushions and seating out of the landfill.
A cleaner, more finished look
Even small changes, such as restoring faded armrests, can make the whole cockpit feel newer.
Custom coatings leather dye for boats and marine interiors works best when the goal is restoration, not repair of destroyed material. If the surface has deep cracks, foam damage, or active mould inside the cushion, fix those problems first.
Before-and-after ideas that can inspire your project
A dye project does not have to mean a dramatic colour change. Some of the best results are subtle.
Before
White cockpit cushions have yellow staining from sunscreen and age.
After
A warm off-white dye evens out the colour, while a satin topcoat keeps the finish soft and clean.
Before
Navy accent panels are sun-bleached to grey-blue.
After
A deep marine blue brings contrast back to the cabin and pairs well with chrome and teak details.
Before
A tan captain’s chair looks faded on the bolsters but dark in the seams.
After
A richer caramel tone adds depth and hides future wear better than the original pale shade.
Before
Mixed replacement cushions make the lounge look patched together.
After
A coordinated dye plan ties the seating into one clean colour scheme.

Choose a colour that suits the boat and the way it is used
Colour choice affects both style and maintenance. Bright white looks classic, but it shows transfer from clothing, sunscreen, and dirt faster than mid-tone colours. Dark shades feel sleek, yet they can get hot in full sun.
A good marine palette often starts with one of these approaches:
Original match
Best for preserving a factory look and restoring resale appeal.
Soft neutral update
Cream, warm grey, sand, and taupe work well in Canadian boating conditions because they feel bright without looking stark.
Nautical contrast
Navy, charcoal, or deep green accent panels can sharpen the look of a cockpit without overwhelming it.
Two-tone design
Use a lighter main colour with darker bolsters or inserts to hide high-contact wear.
Before committing, test the dye on a hidden area or a spare piece of similar material. Let it dry fully and view it in daylight, shade, and cabin lighting. Marine interiors can shift colour visually because of reflections from water, gelcoat, and wood trim.
How to apply leather dye effectively
Good results come from preparation. Rushing the cleaning stage is the most common reason dye fails.
Inspect the surface
Look for cracks, loose stitching, peeling old coatings, mildew, and hardened areas. Dye works best on sound material. Repair holes and seam issues before colour work begins.
Clean the upholstery thoroughly
Use a marine-safe cleaner to remove salt, sunscreen, oils, dirt, and old protectants. Pay extra attention to seams and textured grain. Rinse or wipe away residue as directed by the product.
Deglaze or lightly abrade the surface
Many dye systems require a prep solution or very light sanding pad to open the surface. The goal is not to damage the material. The goal is to help the dye bond evenly.
Mask nearby areas
Cover fibreglass, wood trim, hardware, stitching you do not want coloured, and electronics. Dye overspray or drips can be difficult to remove once cured.
Apply thin coats
Use a sponge, small brush, or low-pressure sprayer depending on the product. Thin coats look smoother and flex better than one heavy coat. Let each layer dry as directed.
Build colour gradually
Expect several light passes, especially when changing colour. Watch for pooling in seams and wipe it before it dries.
Seal with a protective topcoat
A clear marine-appropriate finish helps protect against UV exposure, abrasion, and moisture. Choose matte, satin, or gloss based on the look of the original upholstery.
Let the finish cure
Dry to the touch does not always mean ready for use. Give the coating enough curing time before sitting on it, stacking cushions, or covering the boat.

Maintain the finish so it lasts
After the dye cures, treat the upholstery like a finished surface, not raw material. Gentle care protects the colour and keeps the topcoat from wearing down too soon.
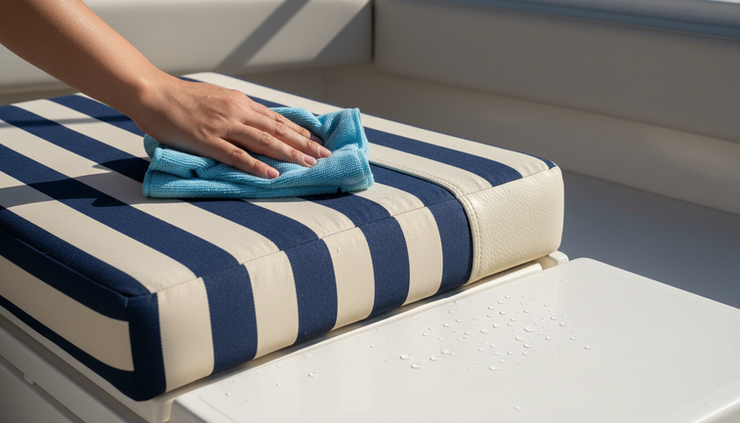
Use mild cleaners and soft cloths. Avoid bleach, harsh solvents, abrasive scrub pads, and household products that leave oily residue. Wipe sunscreen, spilled drinks, and fish oils as soon as possible. If the boat sits uncovered, use breathable covers where practical and keep cushions dry between outings.
A simple routine helps:
Wipe seats after each trip with fresh water and a soft towel.
Clean more deeply at the start and end of the boating season.
Reapply a compatible protectant when the finish begins to look dry.
Touch up high-wear areas early, before the colour loss spreads.
Small changes can make the whole boat feel renewed
Custom leather dye can turn a tired cabin or cockpit into a space that feels brighter, cleaner, and more personal. The key is to respect the process. Choose a colour that suits the boat, prepare the surface carefully, apply thin coats, and protect the finish once it cures.
The reward is more than a better-looking seat. It is the feeling of stepping aboard and seeing a boat interior that matches the care put into the rest of the vessel.


Comments